使用 Kafka Connect 导入 Kafka 数据
本教程将演示如何在 Confluent Cloud 中的 Kafka 与 Databend Cloud 之间搭建 Kafka Connect Sink 流水线,使用 databend-kafka-connect 插件生产消息并写入 Databend Cloud。
步骤 1:搭建 Kafka 环境
首先在 Confluent Cloud 中准备 Kafka 环境。
- 注册并登录免费的 Confluent Cloud 账号。
- 参考 Confluent Quick Start 在默认环境中创建基础 Kafka 集群。
- 按照 Install Confluent CLI 在本地安装 CLI,并登录:
confluent login --save
- 使用 CLI 创建 API Key,并将其设置为当前 Key:
confluent kafka cluster list

confluent api-key create --resource lkc-jr57j2
...
confluent api-key use <your-api-key> --resource lkc-jr57j2
步骤 2:上传自定义 Connector 插件
本步骤将 databend-kafka-connect Sink 插件上传到 Confluent Cloud。
- 在 GitHub Releases 下载最新版 databend-kafka-connect。
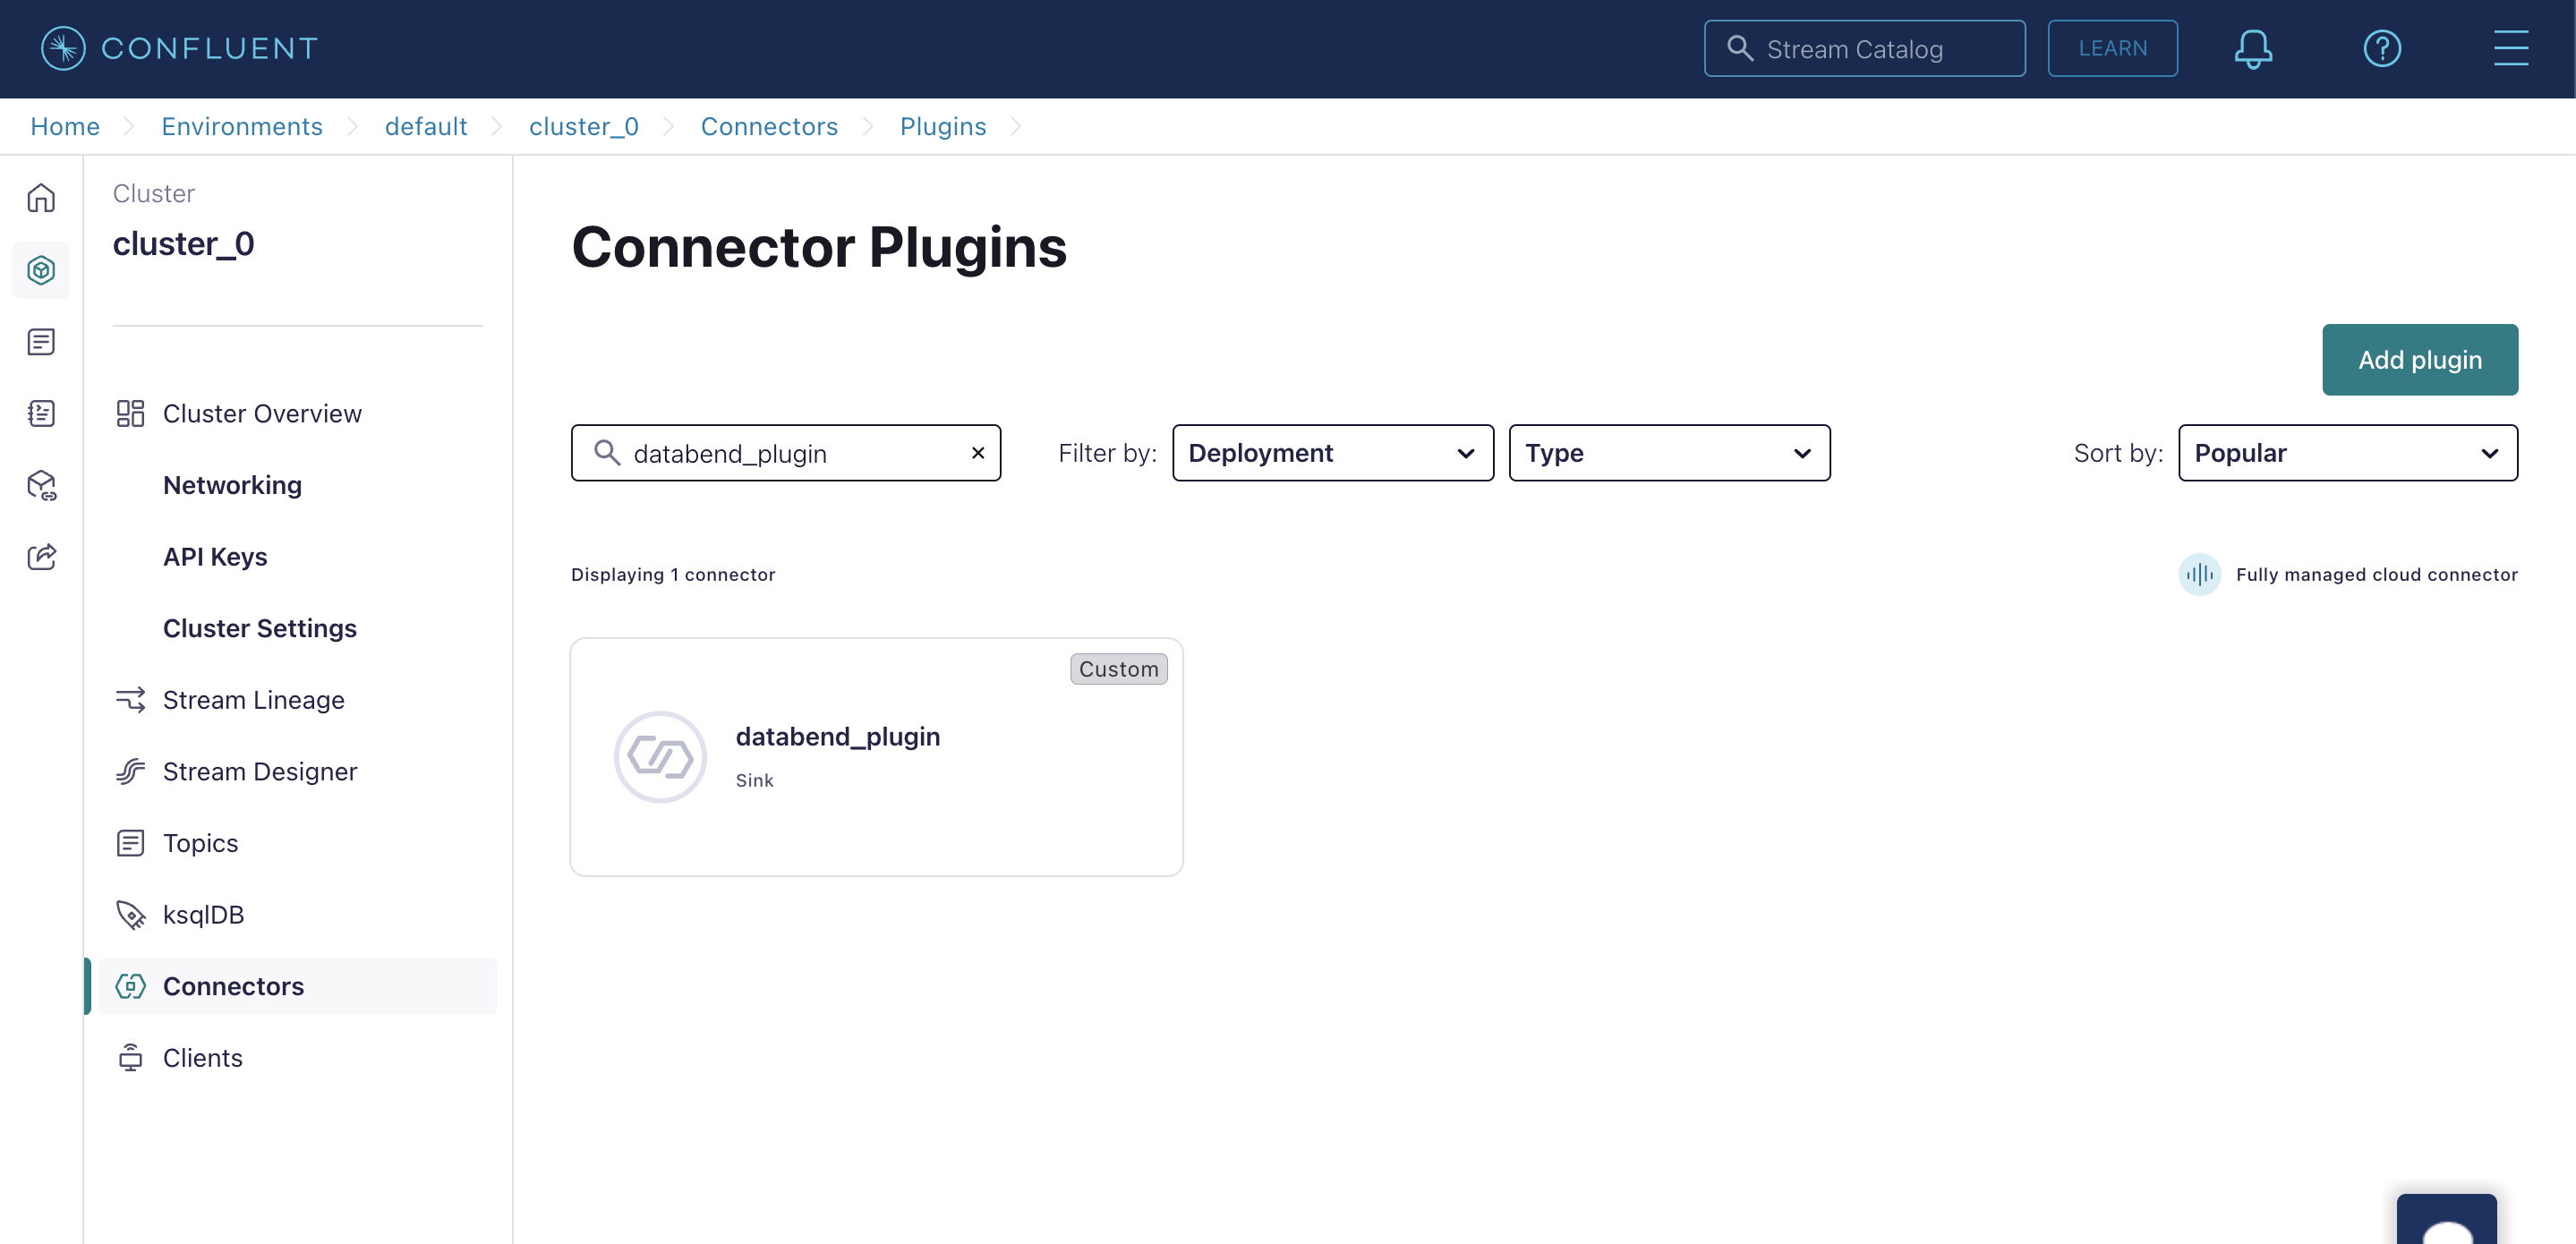
- 在 Confluent Cloud 中依次点击 Connectors > Add Connector > Add plugin。
- 填写以下信息并上传插件包:
| 参数 | 说明 |
|---|---|
| Connector plugin name | 例如 databend_plugin |
| Custom plugin description | 例如 Kafka Connect sink connector for Databend |
| Connector class | com.databend.kafka.connect.DatabendSinkConnector |
| Connector type | Sink |
步骤 3:创建 Kafka Topic
- 在 Confluent Cloud 中点击 Topics > Add topic。
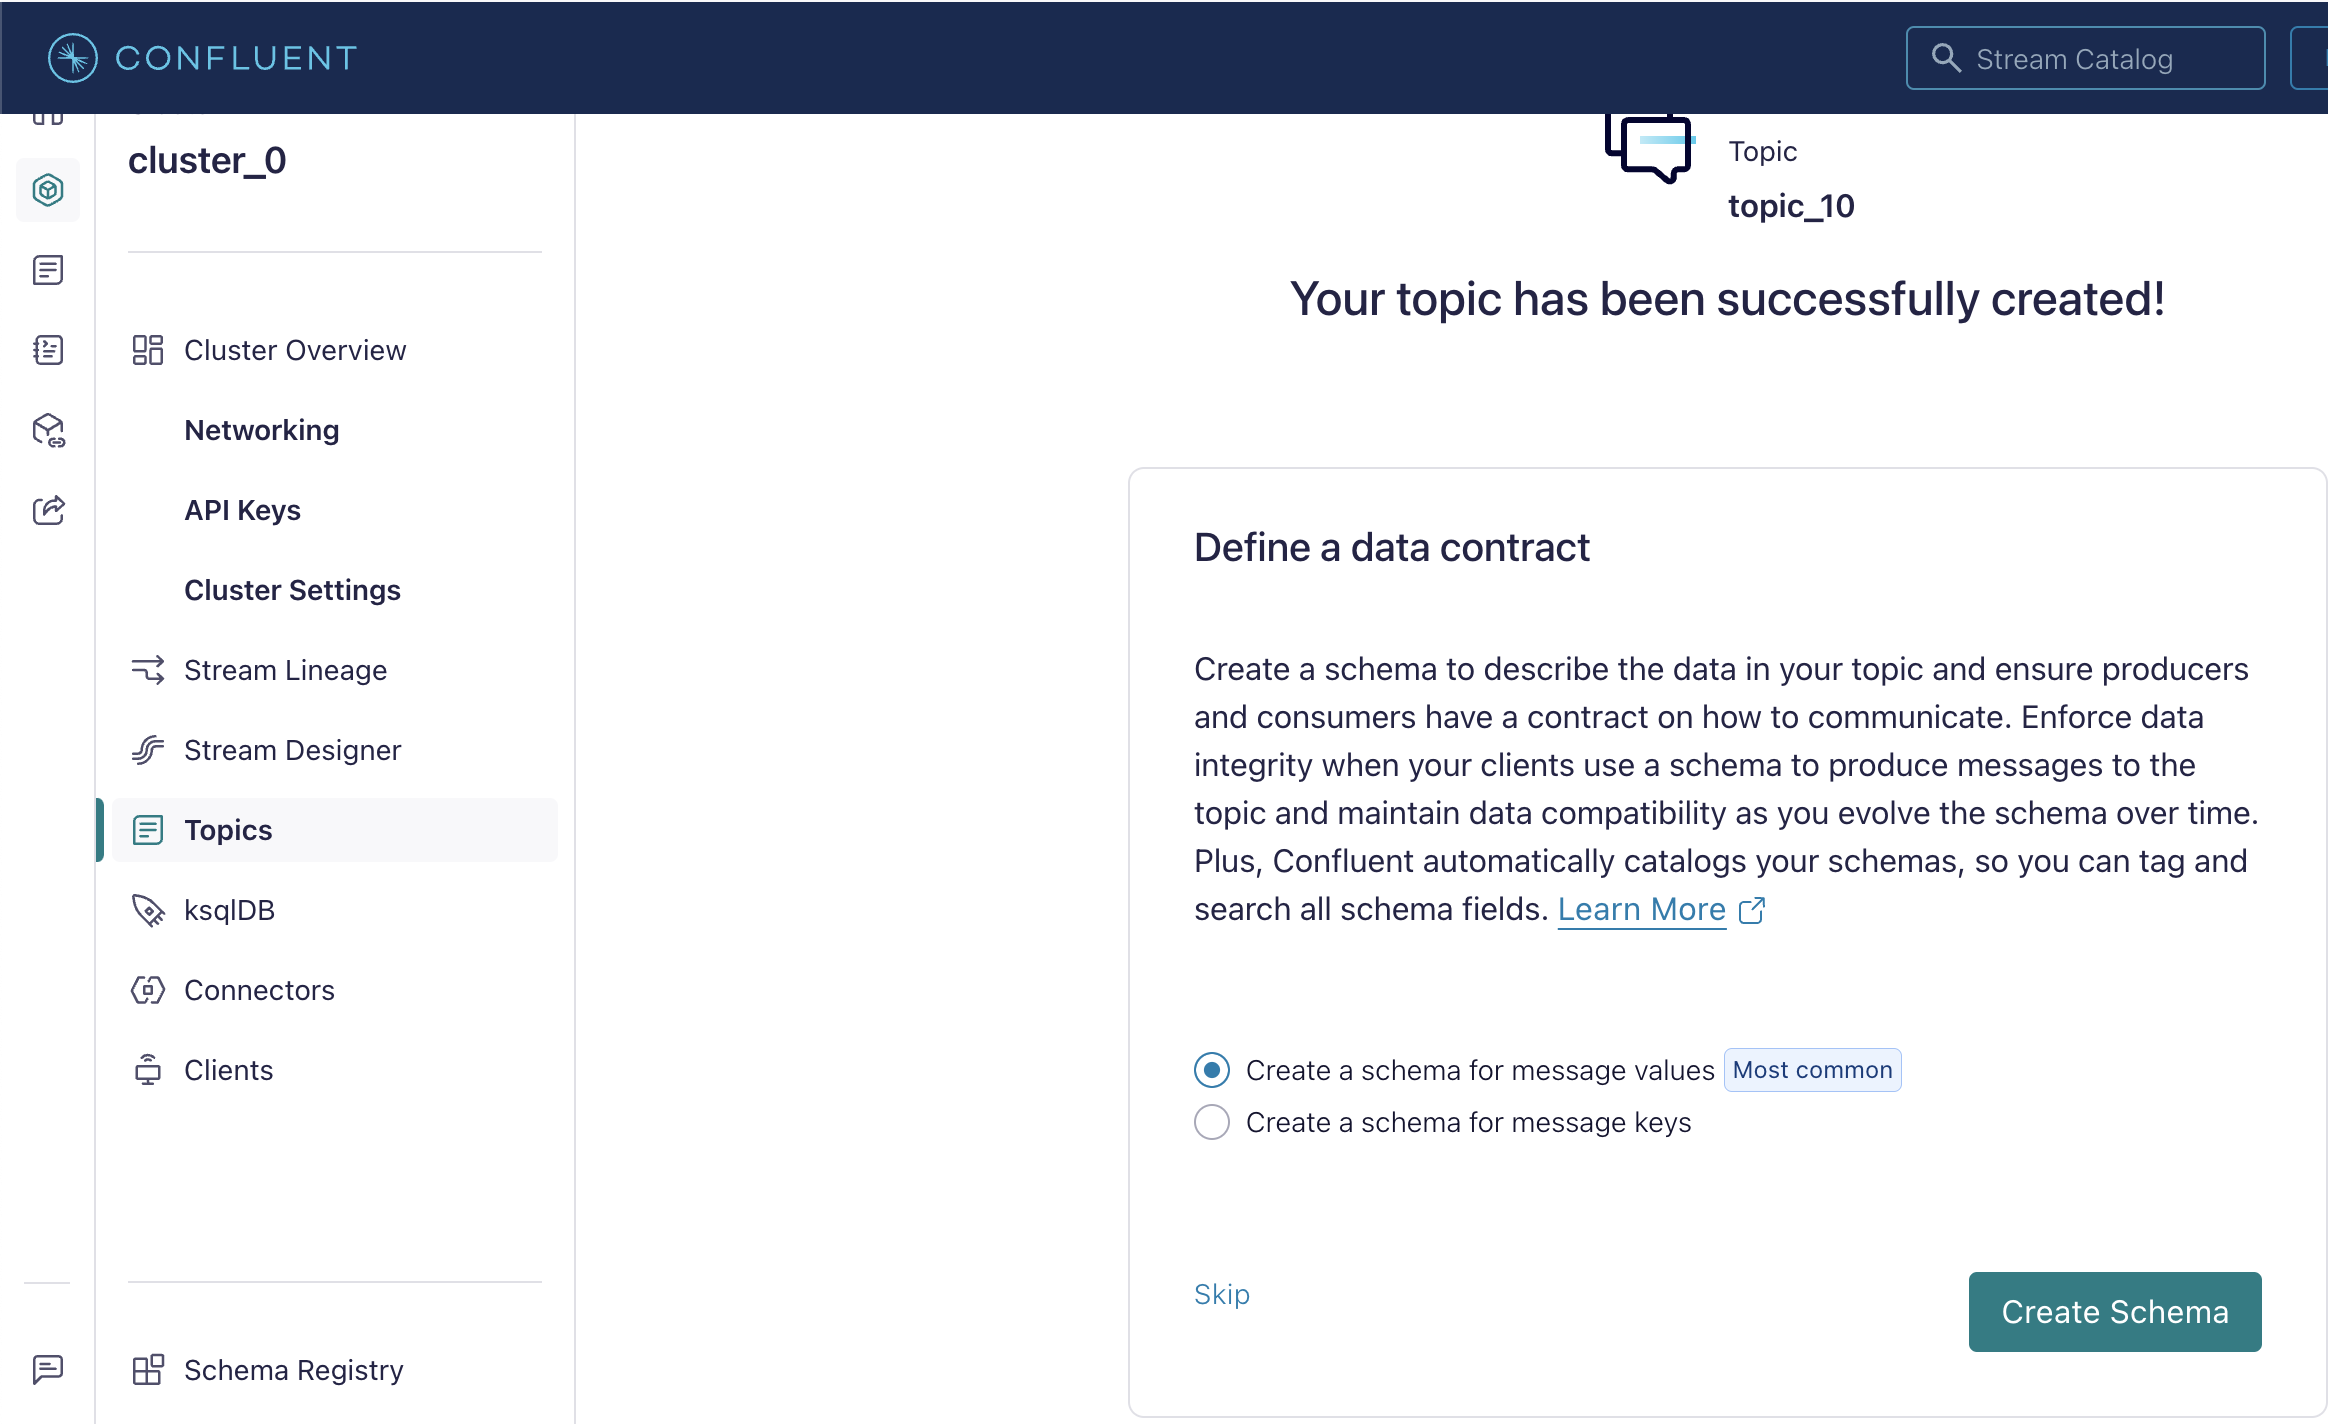
- 设置 Topic 名称(如
databend_topic),继续下一步。 - 选择 Create a schema for message values,点击 Create Schema。
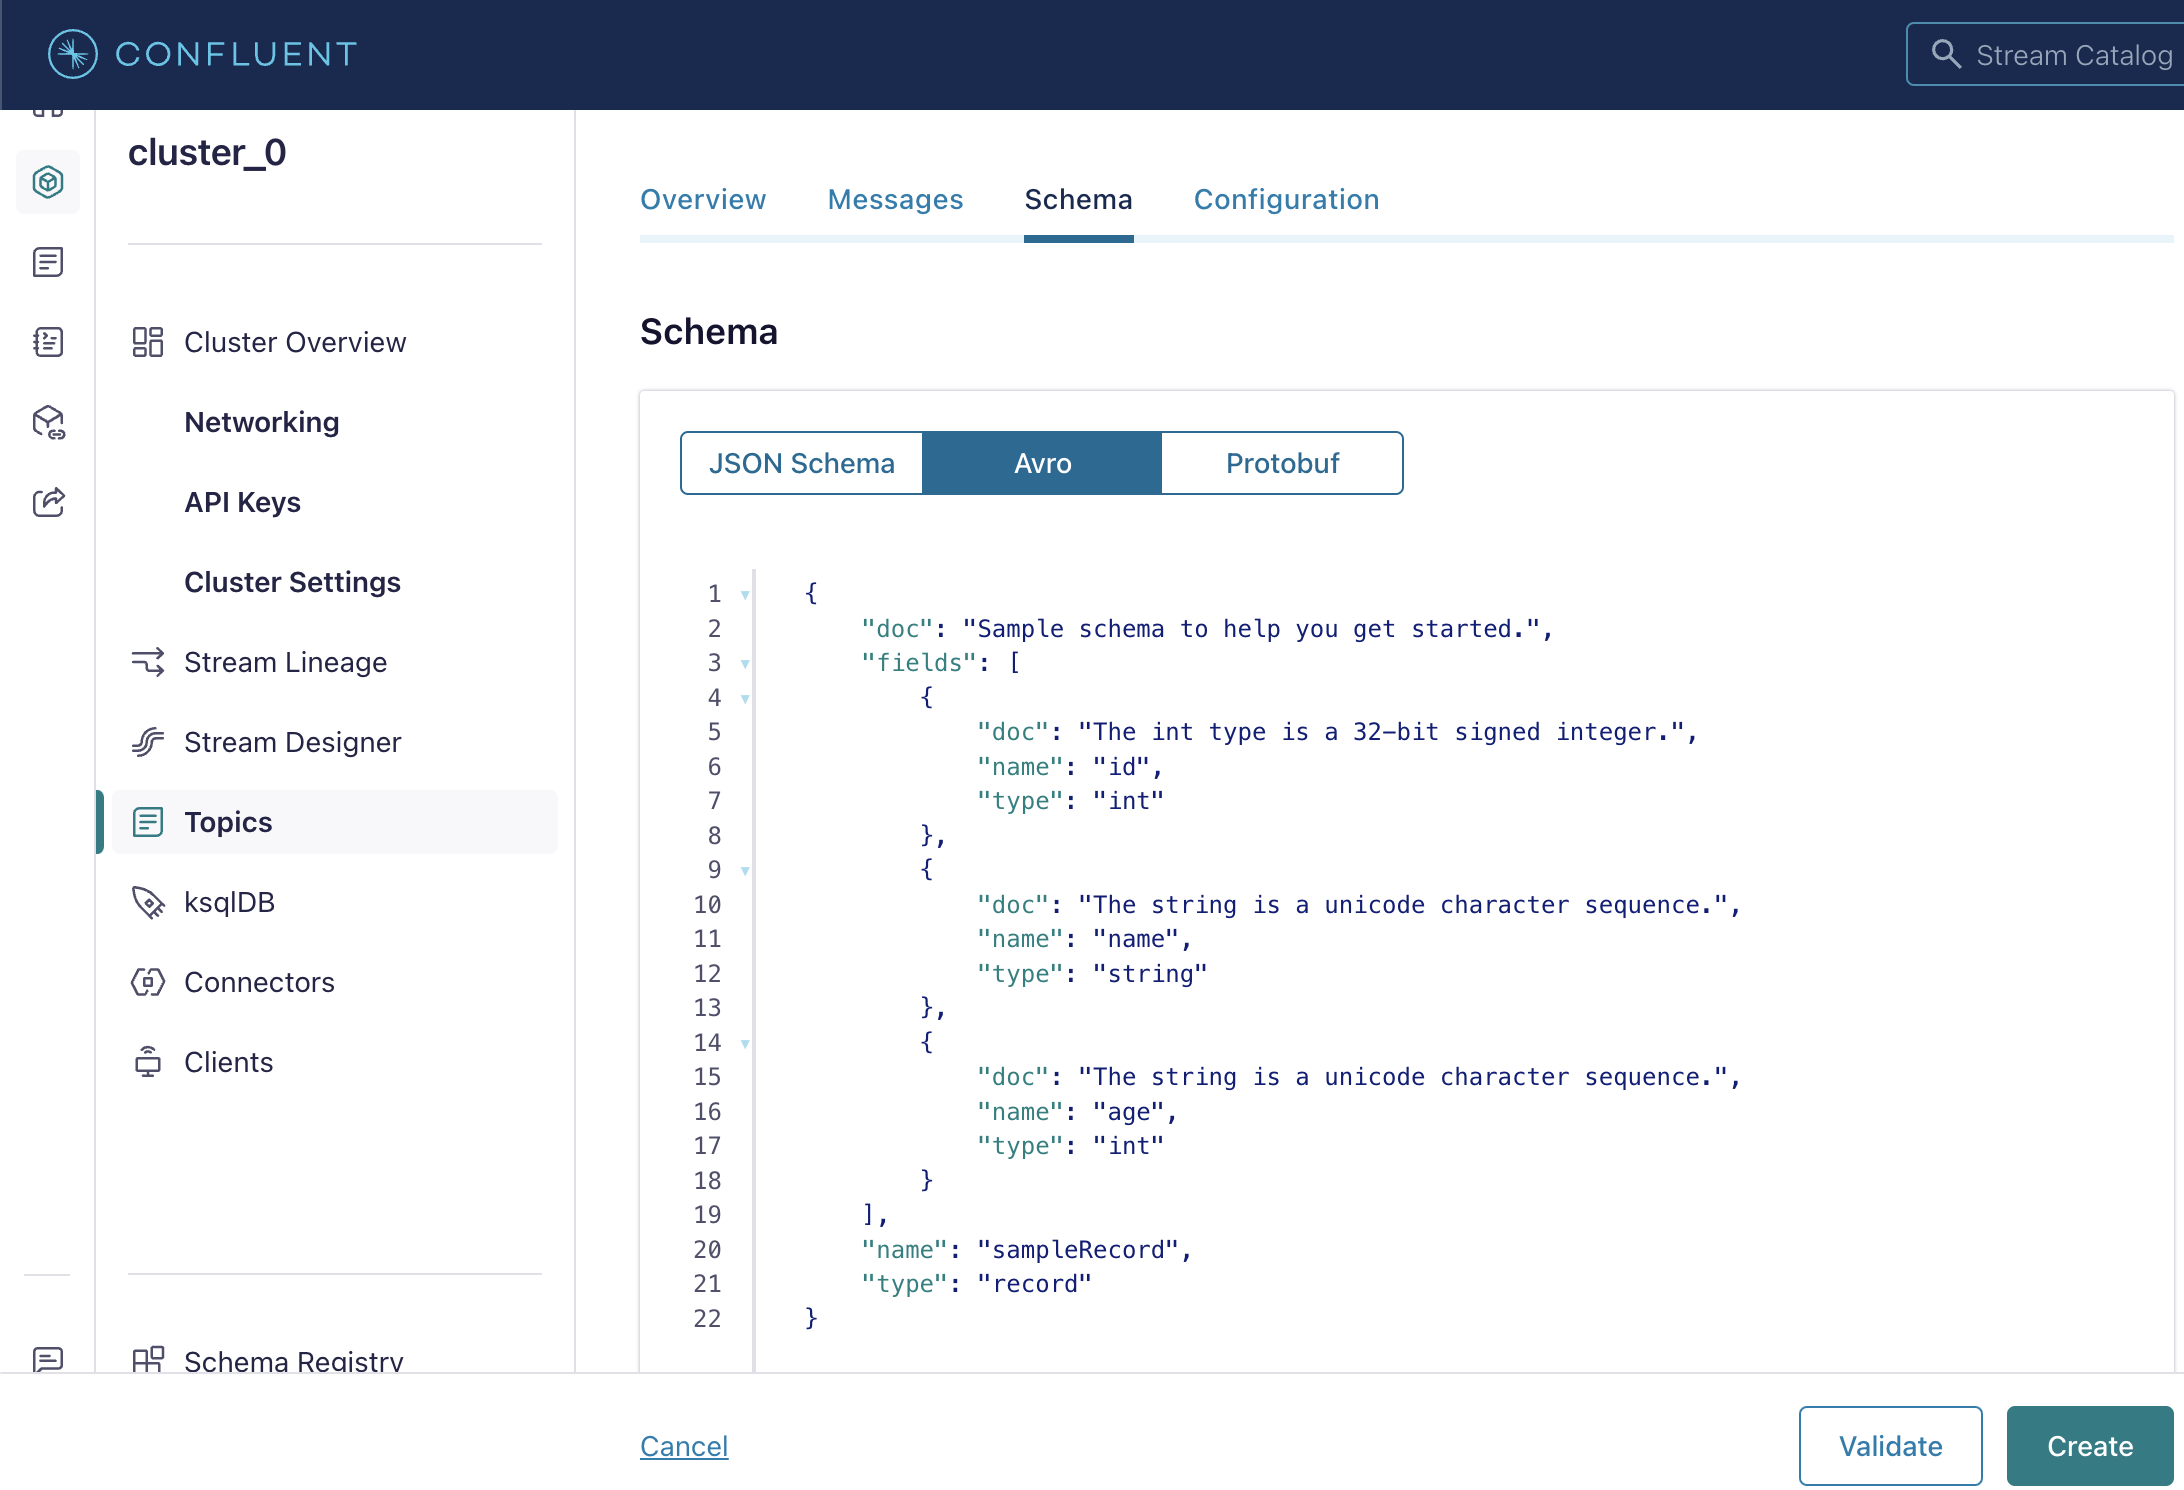
- 在 Add new schema 页面选择 Avro 标签页,并粘贴以下 Schema:
{
  "doc": "Sample schema to help you get started.",
  "fields": [
    {
      "doc": "The int type is a 32-bit signed integer.",
      "name": "id",
      "type": "int"
    },
    {
      "doc": "The string is a unicode character sequence.",
      "name": "name",
      "type": "string"
    },
    {
      "doc": "The string is a unicode character sequence.",
      "name": "age",
      "type": "int"
    }
  ],
  "name": "sampleRecord",
  "type": "record"
}
步骤 4:添加 Connector
- 在 Confluent Cloud 中点击 Connectors > Add Connector,选择刚上传的插件。
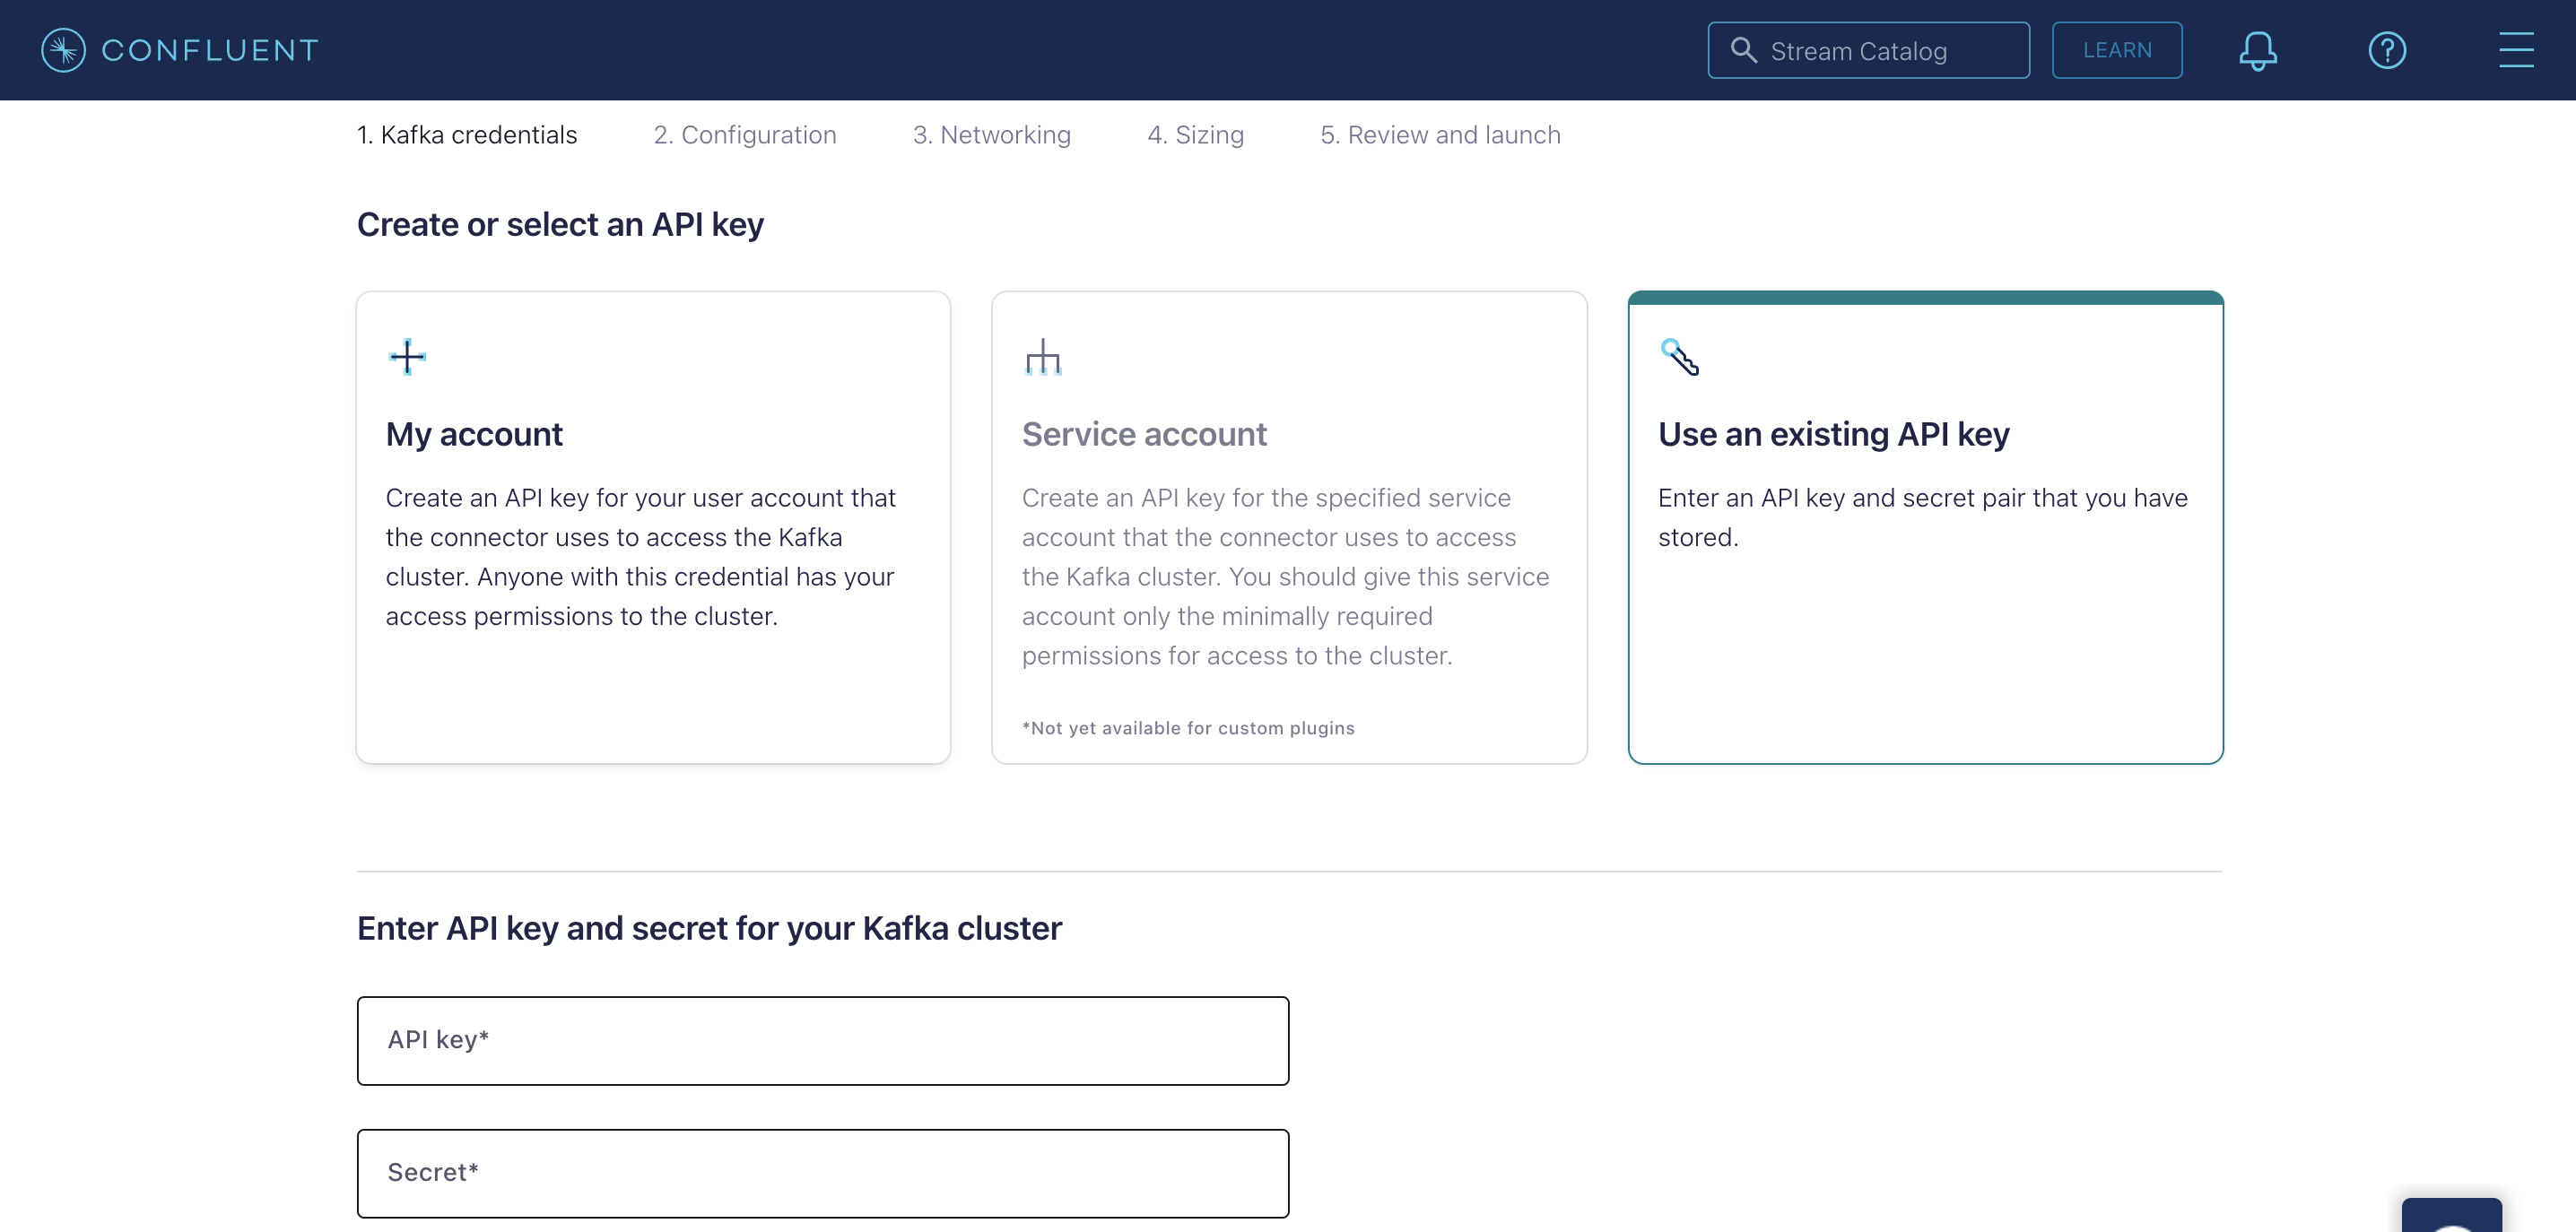
- 在 Kafka credentials 步骤中选择 Use an existing API key,输入之前创建的 API key 与 secret。
- 在 Configuration 步骤中切换到 JSON 标签页,粘贴以下配置并替换占位符:
{
  "auto.create": "true",
  "auto.evolve": "true",
  "batch.size": "1",
  "confluent.custom.schema.registry.auto": "true",
  "connection.attempts": "3",
  "connection.backoff.ms": "10000",
  "connection.database": "<your-value>",
  "connection.password": "<your-value>",
  "connection.url": "jdbc:databend://<your-value>",
  "connection.user": "cloudapp",
  "errors.tolerance": "none",
  "insert.mode": "upsert",
  "key.converter": "org.apache.kafka.connect.storage.StringConverter",
  "max.retries": "10",
  "pk.fields": "id",
  "pk.mode": "record_value",
  "table.name.format": "<your-value>.${topic}",
  "topics": "databend_topic",
  "value.converter": "io.confluent.connect.avro.AvroConverter"
}
- 在 Networking 步骤中填写 Databend Cloud Warehouse Endpoint,例如
xxxxxxxxx--xxx.gw.aws-us-east-2.default.databend.com。 - 在 Sizing 步骤中设为 1 task。
- 在 Review and launch 中为 Connector 命名,例如
databend_connector。
步骤 5:生产消息
- 将用于 Topic 的 Schema 保存为本地
schema.json文件。
{
    "doc": "Sample schema to help you get started.",
    ...
}
- 使用 Confluent CLI 执行
confluent kafka topic produce <topic_name>,向 Kafka Topic 发送消息:
confluent kafka topic produce databend_topic --value-format avro --schema schema.json
Successfully registered schema with ID "100001".
Starting Kafka Producer. Use Ctrl-C or Ctrl-D to exit.

{"id":1, "name":"Alice", "age":30}
{"id":2, "name":"Bob", "age":25}
{"id":3, "name":"Charlie", "age":35}
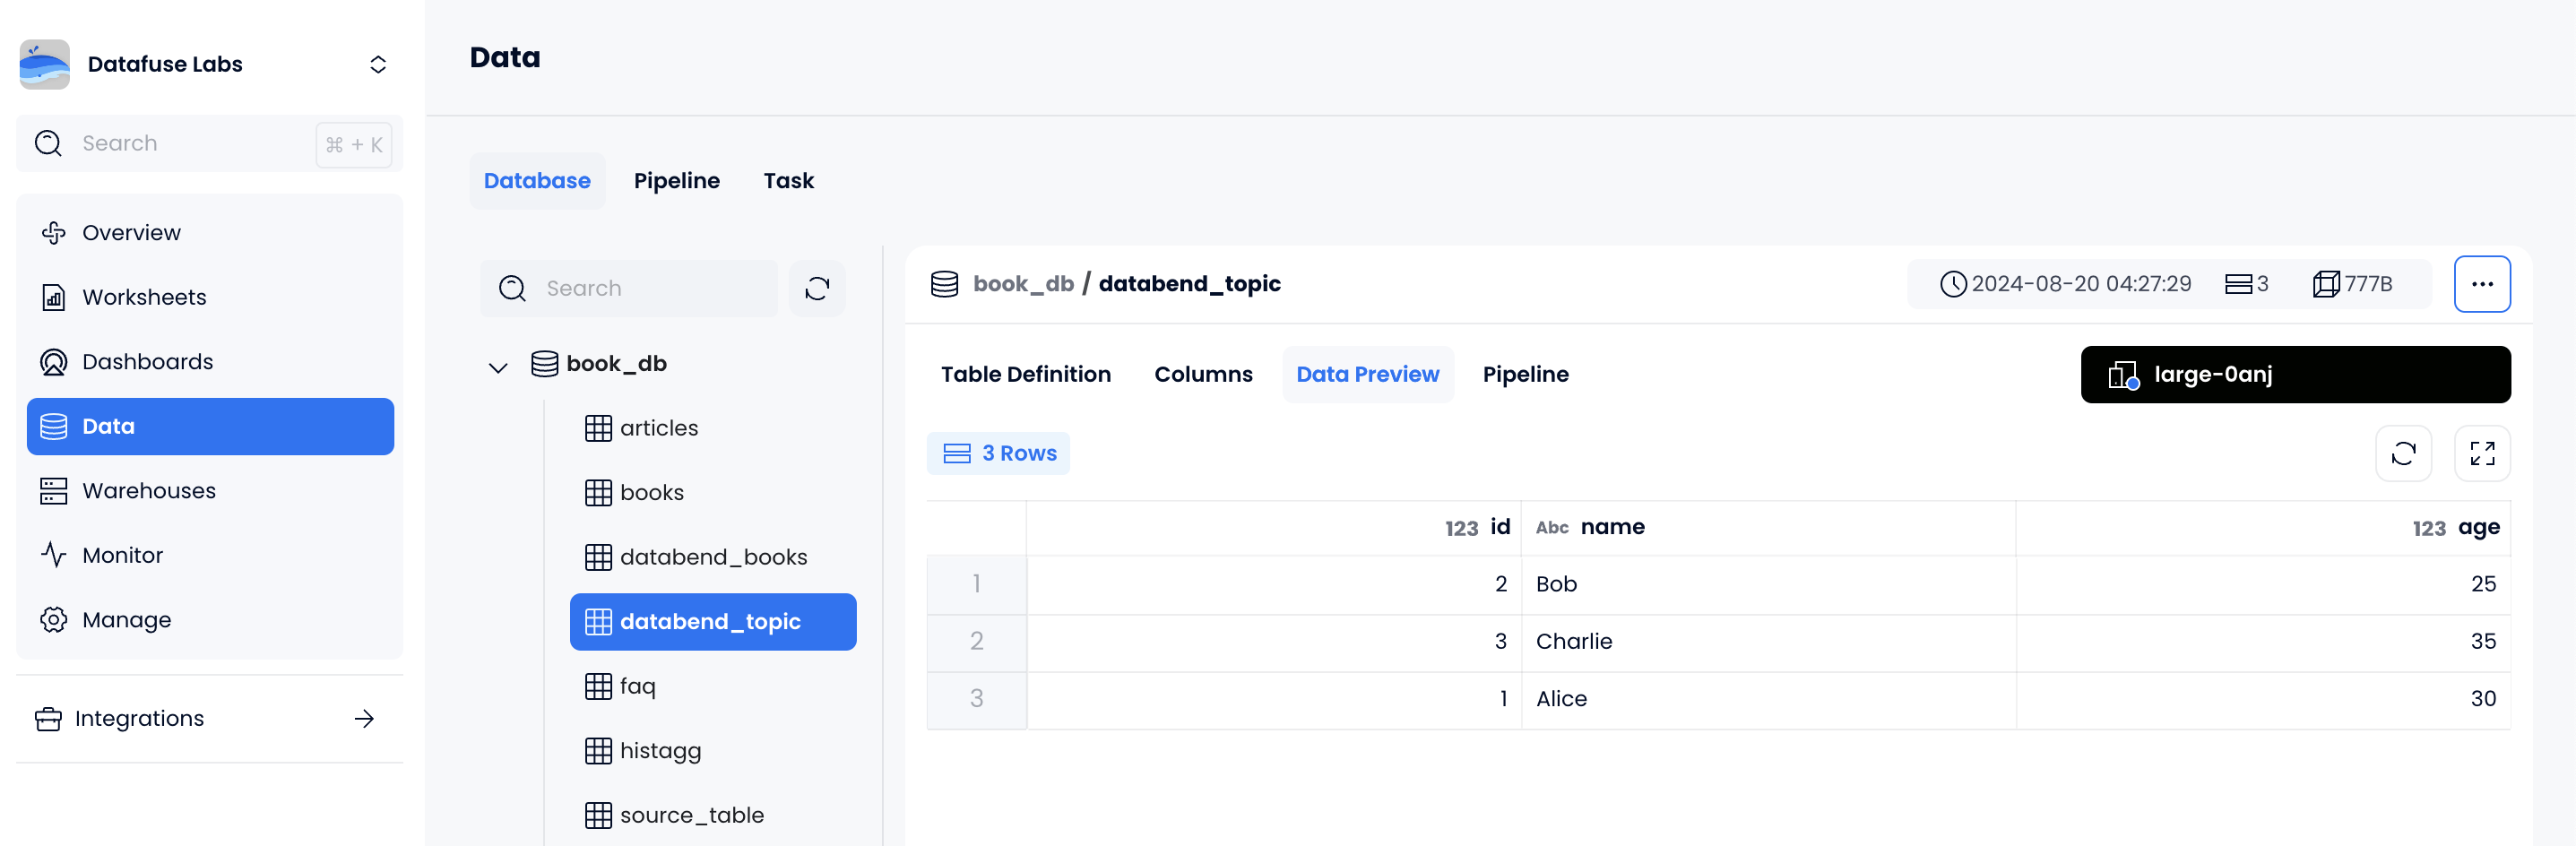
- 在 Databend Cloud 中查看数据,确认写入成功: